Adding a Voltmeter to the 200NS

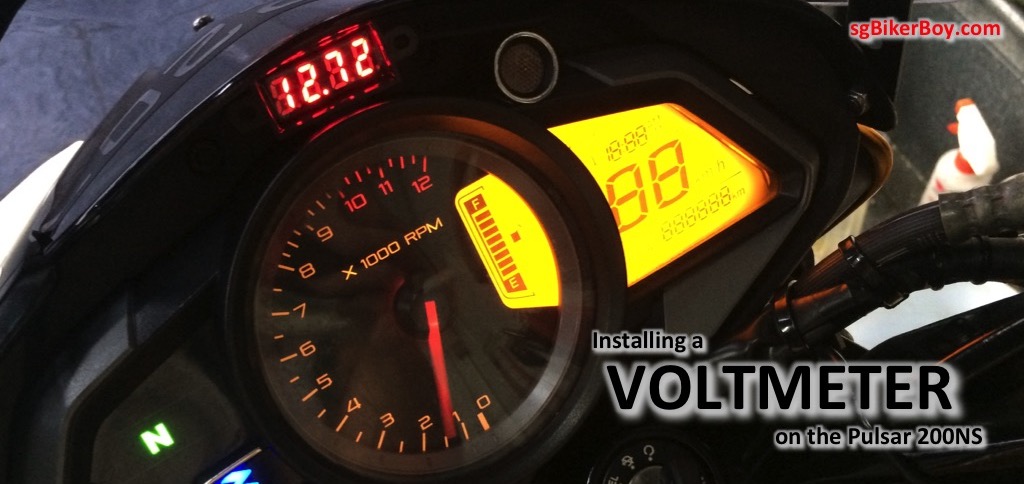
I’ve resisted this modification for awhile. But after reading reports of failing regulators / rectifiers (RR) and stator coils – not just on the Bajaj Pulsar 200NS, but not an uncommon failure on almost any motorcycles, I’ve decided to add a voltmeter to the bike so that I can keep a constant eye on the health of my motorcycle’s electrical system.

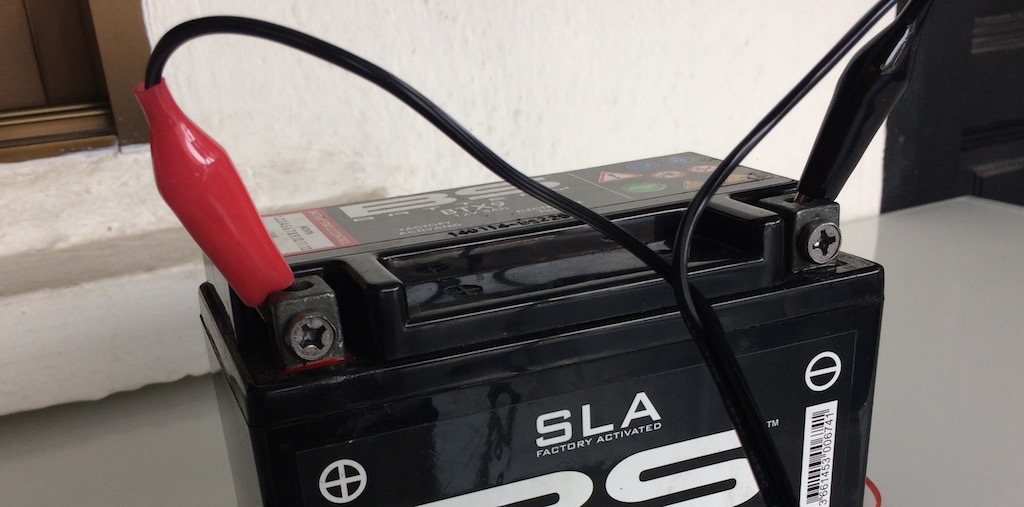
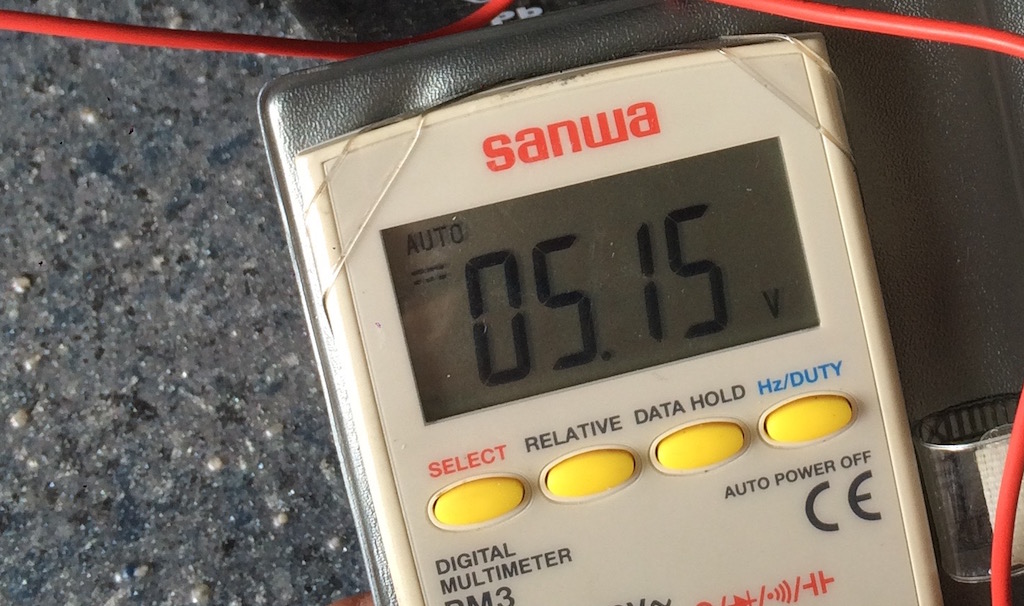
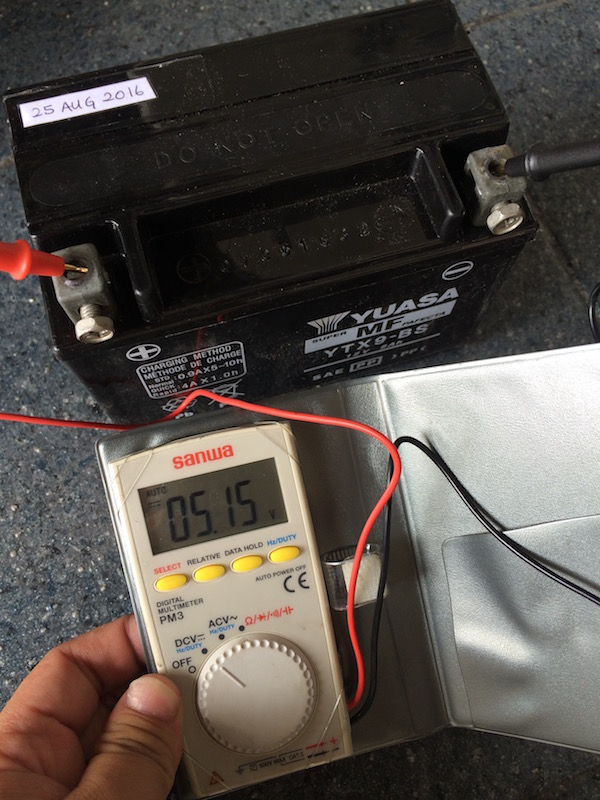
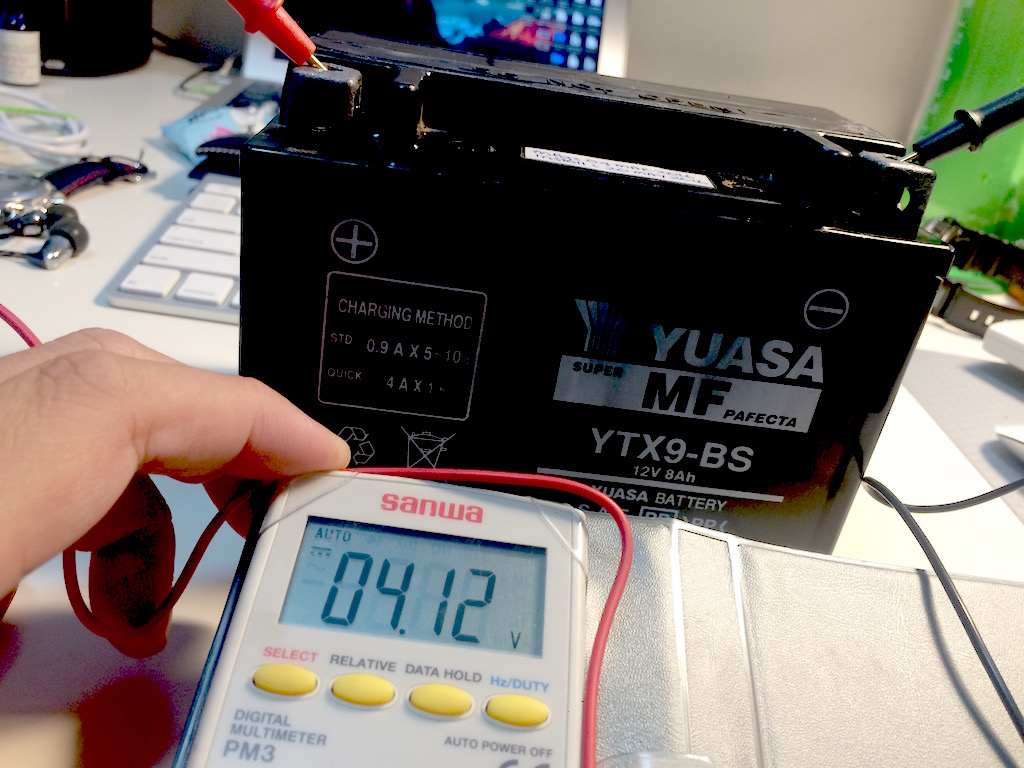
By the way, did you know that the number one cause for RR and stator coil failures is NOT the addition of electrical accessories, but rather a bad battery? The typical electrical loads additional (reasonable) accessories demand from the bike’s electrical system is usually very, very well within what the electrical generation system can handle. But when a battery goes bad, and if a single cell within the 12V lead acid battery shorts (a typical 12V battery has 6 cells), this draws a significantly increased amount of current from the bike’s electrical generation system. This large current draw puts a tremendous strain on the electrical system until something – typically either the RR or the stator, or both – gives way and burns up. So remember this – periodically replacing a battery BEFORE it goes bad is good preventive maintenance for your bike’s electrical system. And this is one reason why I choose to replace old batteries instead of waiting for them to go bad.

The (hopefully) waterproof mini voltmeter.

Continue reading “Adding a Voltmeter to the 200NS”

Front sprocket gooey grime (again) at 800km

With a new chain on, I decided to take a peek at my front sprocket.Some of you might have remembered that I performed a deep cleaning of my front sprocket only about 800km ago. And so I expected it to be relatively clean now. But when I popped open the sprocket cover…

Accumulated blob of grim at the bottom of the removed sprocket cover.

Eeew! Yucks! Phhht!

There’s a MASSIVE blob of sticky, gooey grime at the bottom of the sprocket cover! And when I dug around the sprocket shield further… Continue reading “Front sprocket gooey grime (again) at 800km”

Valve Clearance Check on my Pulsar 200NS

It’s been 14,000km since I had my engine top rebuilt in Chiang Mai and I’ve not done the valves clearance check on my Pulsar 200NS. And since it was the Chinese New Year holiday and I’ve completed my CNY visiting, with some time at hand, I decided to DIY the valve clearance check this afternoon.

To get to the valves, the following has to be removed: tank cover, fuel tank, air filter box, and then the valve head cover. I’ve previously blogged about the removal process of the above.

Remove these 4 special bolts from the engine head cover.

After removing the 4 bolts on the engine head cover / valve head cover, carefully remove the cover taking care not to damage the gasket. I visually inspected my head gasket and found it to be in excellent condition (approx 6 months old), and although I bought a new piece for this procedure, I had decided that it was good enough to re-use. I’d probably replace it if / when it starts to leak. Continue reading “Valve Clearance Check on my Pulsar 200NS”

Bajaj Pulsar 200NS DIY Maintenance Guide

I’ve received many requests for information on how to perform some DIY maintenance on the Pulsar 200NS. In this Bajaj Pulsar 200NS DIY Maintenance Guide, you’ll learn the following:

  1. Fuel tank cover removal.
  2. Fuel tank removal.
  3. Air filter replacement.
  4. Coolant replacement.

Some of the tools required:

  • 8mm, 10mm and 12mm hex sockets
  • Hex bit set
  • Phillips-head (+ shaped) screwdriver
  • Long-nose pliers

Continue reading “Bajaj Pulsar 200NS DIY Maintenance Guide”

Weekend Project – restoring the fuel lid

I spent some weekend time pampering my bike. Pressure washed the engine area to get rid of some built-up gunk and applied a layer of wax (more specifically, a layer of polymer sealant – Autoglym’s Extra Gloss Protection) on the paintwork. It’s been some time since I treated the paint and I thought it was about time.

And since I was on the subject of paint, my fuel tank lid has accumulated some scratches and paint peel on it. Some of which was my own contribution (fuel station’s nozzle hitting the paintwork), but the majority of it was by the previous owner of the bike. You see, when I purchased the bike pre-owned, the fuel tank lid was already quite badly scratched up.

Closeup of tank lid before spray painting.

Continue reading “Weekend Project – restoring the fuel lid”

$1 DIY Motorcycle Battery Charger

Since I published the blog posts on my dead motorcycle battery, I have received a couple of queries asking me what I used to charge my lead acid battery and where I bought it from. And after I told them that I built it from some electronic scrap parts and it cost me close to nothing, they were surprised.

So, I’ve decided to write this post to share with you on how you can build your very own DIY home made battery charger for almost free – well, if you already have most of the parts like I did. And even if you don’t, you can probably get it quite cheaply from an electronics parts store such as those in Sim Lim Square.  Continue reading “$1 DIY Motorcycle Battery Charger”

I think it’s the IU that killed my battery

Arghh! I couldn’t start my motorcycle again this morning! The last time I fired up my Pulsar 200NS was Tuesday – that’s only 5 days ago. Granted, I haven’t been riding much. But still, it was ONLY FIVE DAYS!

Since the last battery death and replacement, I’ve double checked all my additional electrical components, and am ABSOLUTE CERTAIN that, apart from the IU, none of the other additional electrical circuits are powered up when the bike is turned off. I’ve even went so far to remove my remote controlled alarm – which I suspected could be the cause of the battery drain.

5.15V on the battery.

Continue reading “I think it’s the IU that killed my battery”

I think I killed my motorcycle battery

I had only replaced the battery on my Pulsar 200NS motorcycle 3 months ago – just before I took it on a 2-month tour around SE Asia. My previous battery was about 2 years old and I didn’t want to risk a bad battery on the trip.

But shortly after returning to Singapore, and while performing maintenance on the bike, I had absent-mindedly left the key in the ignition and in the ON position. That severely drained the battery and was left with less than 5V. After an eventful jumpstart, stalling the engine down the road, and a good samaritan assisting in “push starting” my bike using his own motorcycle and his leg, I managed to get to KL and back without incident.

After the incident, I was  Continue reading “I think I killed my motorcycle battery”

$2 Touring Seat Air Cushion

Was shopping at Daiso earlier today. Yes – that famous $2 store where everything goes for $2. And I came across this inflatable seat cushion. Thought that it might come in useful for longer motorcycle rides – similar in concept to the AirHawk, only much much cheaper. I’m yet to figure a way to secure it to the seat. But at $2, it won’t be too painful if I lose it. Just make sure I keep it slightly under-inflated.

The $2 air cushion from Daiso.

New rims – Autoglym Bumper and Trim gel

No Sunday ride today as I was feeling a little under the weather. Perhaps due to not sleeping well lately. So, I took the opportunity to do some bike maintenance instead.

After the usual washing and drying, I noticed some black parts of the bike were beginning to look faded. So I whipped out my bottle of Autoglym Bumper and Trim gel and started to apply it on the various matte black areas of the bike – especially the top box and panniers.

Autoglym Bumper and Trim gel. $17.55 from Autobacs on a sale.

Continue reading “New rims – Autoglym Bumper and Trim gel”