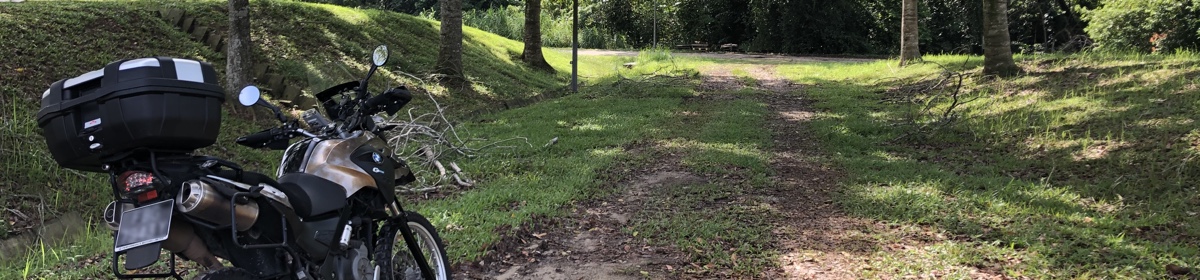
It’s been 14,000km since I had my engine top rebuilt in Chiang Mai and I’ve not done the valves clearance check on my Pulsar 200NS. And since it was the Chinese New Year holiday and I’ve completed my CNY visiting, with some time at hand, I decided to DIY the valve clearance check this afternoon.
To get to the valves, the following has to be removed: tank cover, fuel tank, air filter box, and then the valve head cover. I’ve previously blogged about the removal process of the above.
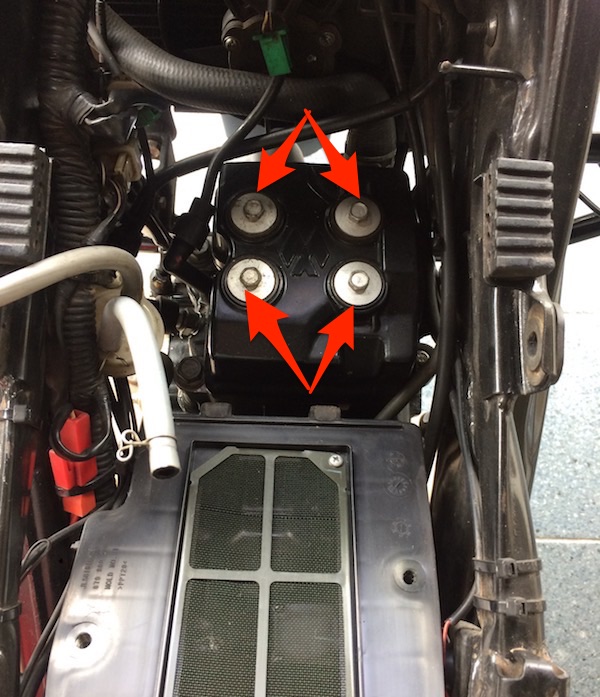
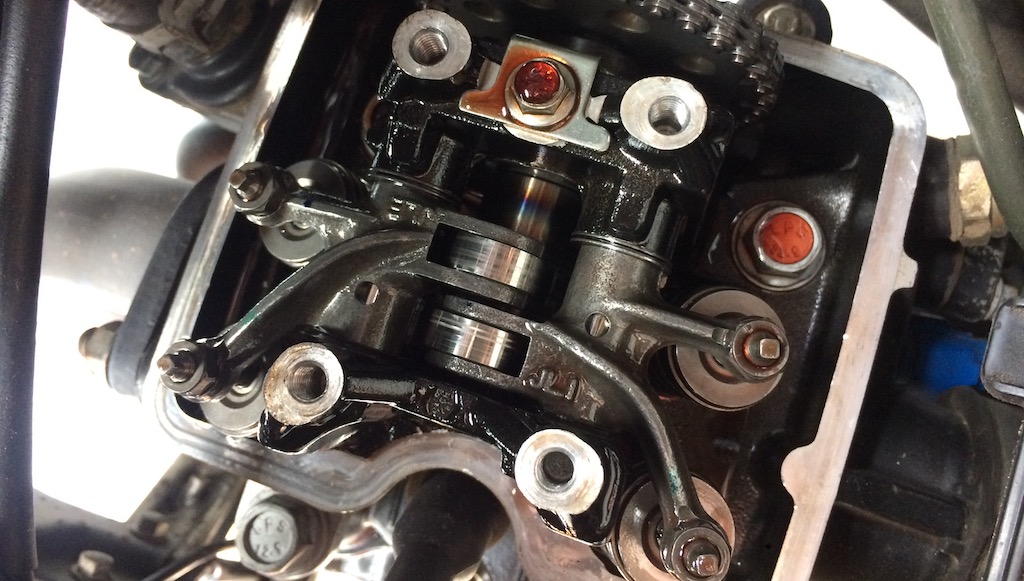
After removing the 4 bolts on the engine head cover / valve head cover, carefully remove the cover taking care not to damage the gasket. I visually inspected my head gasket and found it to be in excellent condition (approx 6 months old), and although I bought a new piece for this procedure, I had decided that it was good enough to re-use. I’d probably replace it if / when it starts to leak.
After removing the valve cover, the next step is to get the engine to top dead centre (TDC). To do this, open up the TDC inspection window cover on the left hand side of the engine casing. Using a 12mm socket, turn the cam sprocket clockwise until the TDC-line aligns with the centre mark.
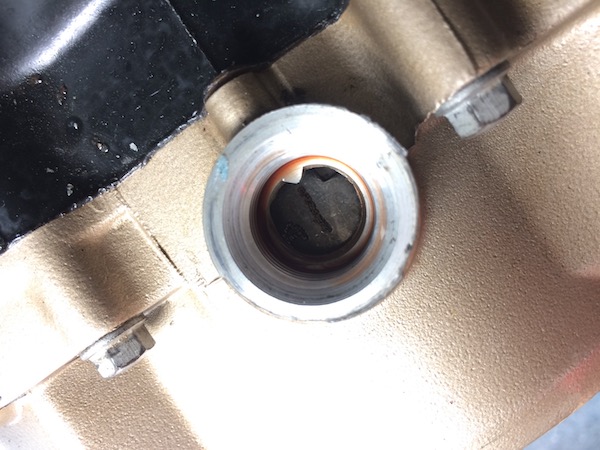
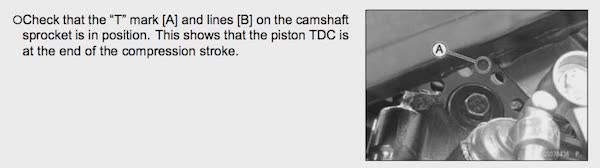
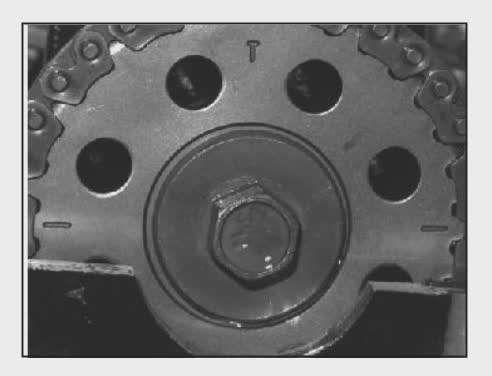
The service manual also calls for the visual inspection of the “T” mark on the cam sprocket to be at the TOP and that the 2 horizontal alignment marks to be parallel to the engine case. But due to the position of the engine being mounted in an awkward manner, it’s blocked by the bike frame and very difficult to inspect. I did manage to spot the “T” at the top of the cam sprocket though.
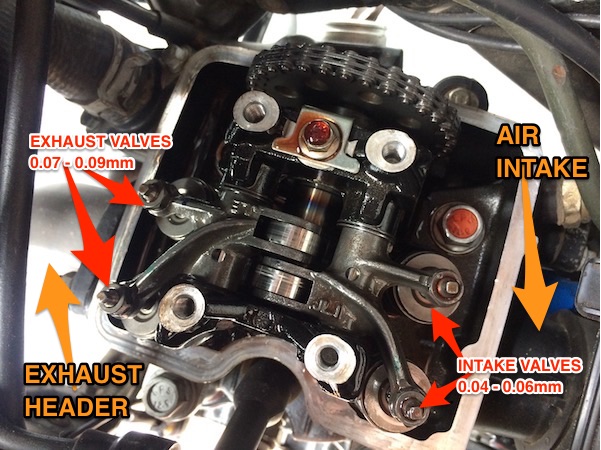
After getting TDC, proceed to measure the clearance of the tappets. According to the service manual, the intake valves are supposed to be between 0.04 to 0.06mm. Exhaust valves should be between 0.07 to 0.09mm. In other words, you’re targeting 0.05mm for the intake valves and 0.08mm for the exhaust valves with a tolerance of +/-0.01mm.
And surprisingly, ALL FOUR valves I measured were SPOT ON! The intake valves would allow my 0.05mm and 0.06mm (a little tight) feeler gauges through, and wouldn’t allow the 0.07mm in. Similarly, both the exhaust valves would allow the 0.08mm and 0.09mm (a little tight) feeler gauges slip through, but not the 0.10mm one. Quite amazing for a 14,000km engine since it was rebuilt.
I didn’t have to adjust the valve clearances this round. But if necessary, you’ll need a 9mm wrench and a pair of needle nose pliers (in lieu of a “special tool”) to hold the adjustment screw in place while you tighten the 9mm locking nut.
With the valve clearance checks done and a piece of mind, I’d probably schedule for the next check again after 10,000km.
Assembled everything back in reverse order and checked my watch. The entire procedure (including some simple fuel hose mod) was completed in just 1hr.
Say! It wasn’t that difficult after all!
Hurrah! U managed to deal with this task rather easily. Congrats! I did my valves check on my Kymco Super 8 125cc…cannot remember when but it was a few years ago & it was just as easy (with alot of help from Youtube). I have clocked more than 10000km since and have not checked them again…Blimey! Anyways, these screw-type adjusters are way easier to check/adjust than those bucket & shim types. Getting to the valves can/will be a PITA too. Maybe that’s why most bike shops do not perform this task/do not think it necessary to perform it/simply ‘Boh Chap’
(couldn’t care less)
You’re absolute correct – most workshops here think that they’re not necessary. In fact, I’ve asked at least 5 independent workshops if they could do the valve clearance check on my Pulsar and ALL of them said the same thing – if you’re changing your engine oils regularly, it’s not necessary. Poor wisdom.
I think the reason why most shops here in Singapore simply ‘boh chap’ is because a vast majority of valve clearances at the initial recommended check intervals are still within tolerances. There’s better engineering, manufacturing and assembly processes these days. But the problem is *IF* the tolerances are out, the consequences can be rather damaging. So instead of relying on shops, I decided to look it up and took up the task the DIY way. Quite frankly, after doing this once, the task don’t seem too daunting thereafter.
Such a nice article. Can you guide me to do the timing chain tension adjustment of NS200. It is placed at a cumbersome place and it is hard to reach.
I’m sorry – I have no experience in that area. Also, it’s not a procedure I’d recommend exploring if you’re not familiar with it too.
I think NS200 Timing Chain Tension Adjustment is not done manually. NS200 has Automatic Chain Tensioner installed. So don’t worry on this part. Its better to change tensioner along with the guide and chain if necessary.
what is intake and exhaust size in pulsar 220 2017 model laser edge (new model)
It’s best that you check with Bajaj on the values of the correct valve clearances on your bike model.
Pls make. Ur channnel in YouTube
hi sgbiker,
Can you please provide me with the service manual for NS200. I have tried to get it but in vain. Im from india and bajaj doesnt provide service manual for ns200. let me know where u got it or if u can mail me it would be great!!
sauravskch@gmail.com
Pleased send me the service manual of 200ns.
I’m afraid I don’t have it. Please request from Bajaj.
Its available online
please send a link to the manual
Thank you and so much helpfulll ?❤
hi! how often is it recommend to do valve clearance?