I cannot speak with authority, but I’ve read that Indian quality has still yet to catch up with their Japanese counterparts. I’m not speaking about reliability here. I’m referring to the finesse of the ride – or what some might refer to as “refinement”.
Although the encapsulated 23 and a half horses within the bike has always been eager to be unleashed by the twisting right wrist, the fairings and panels on this half-naked machine similarly always seem ready to protest with a rude roar. I would have preferred a gentle purr and a certain level of class, but really, that’s probably too much to expect from a single-cylinder two-wheeler built for the masses at low cost. This beast was built for crude, raw power at a low price and luxury was never part of its design philosophy.
And so I set out to discover if I could somewhat tame the rude screams while still retaining the 23.5hp punch.
A simple knock or tap on the (honestly, rather aesthetically pleasing) plastic panels covering this “naked sports” machine reveal rattles practically everywhere. Now, any panel left to vibrate (acoustically) un-damped turns into a speaker of some sort. Volume is especially loud at certain frequencies – typically called “resonance”. This is not just a problem with motorcycles, but also cars. But cars typically have acoustic sound dampeners pasted onto the vibrating panels to mitigate this issue. My 200NS doesn’t have this.
And so I bought some of this sound deadening material off a Chinese online retailer (I think it’s rubber butyl), and set off to attempt to replicate “Japanese refinement” on this Indian beast. From my somewhat limited online research, and coupled with my own “tap tests”, here are some of the common noisy panels on the Pulsar:
1) Fuel tank
2) Fuel tank cover
3) Side plastic panels (left and right)
4) Windshield / console area
5) Headlamp panels
6) Turn indicators
Yes, (6) was a surprise to me. I discovered that my cantilevered turn indicators would produce a slight squeak every time I tapped on it. Not loud, but irritating enough. I figured that the spring mechanism that holds the signal assembly up must be experiencing some form of light corrosion and therefore the squeak. So I bent it over a little, sought out a small vent hole, and squirted some Nano-Protech Anti-Cor anit-corrosion spray into it. Firstly for corrosion prevention, and also for it’s mild lubrication quality. It worked! No more squeaks!
And for the rest of the panels, I merely estimated their sizes, cut out small pieces of sound deadeners and pasted on them – on the inside of course. I took particular care not to paste any of these stuff on the left hand side panel portion that’s directly covering the rectifier. Things can get a little warm in that area (that’s why there’s a large heat sink there), and these rubber butyl mats are not only a good sound insulator, but also a heat insulator. Not good for an electrical component that’s trying to lose heat.
And so, after some hours of what reminded me of my Arts and Crafts lessons back in school days, the unassembled bike looked hideous! Downright freakily ugly! YUCKS! It almost looked like a damaged bike that was patch repaired with some tape material. Maybe it was due to my poor handiwork (hey! I did get a “C” grade for my art class back in secondary school days), or perhaps it was meant to be. But thankfully, none of these will be seen when the bike gets re-assembled. I chuckled to myself as I imagined the look on the face of the next mechanic stripping my bike. Probably not too dissimilar to the startled face of the unsuspecting husband who have never seen his ugly match-made bride as he lifts the veil for the first time on the wedding night.
“Aaahhhhhh!!!!!…. Help!”
Anyway, I put the bike back together and went for a test ride….
And….
Woo hoo! Reduced panel vibrations and ride noise! Yes! Yes! Mission accomplished! The mimicked “Japanese refinement” mod put a smile on my face as the gentle wind kissed my face through the helmet as I went for a short test ride.
Now I got to be honest here. Did this reduce engine vibration noise? Definitely. But it wasn’t as much as I hoped it to be. Perhaps I was overly optimistic as to how “refined” a single cylinder engine can ultimately be. If I had to rate the result, I’d probably compare the reduction in vibrations similar to a fresh engine oil change or adding Marvel Mystery Oil to the fuel tank (see my 2nd SG-KL ride report). But because the effort required to remove the panels to paste this stuff is significantly greater than, say, adding 1oz of additive to the 12L fuel tank at refuel, I was hoping the result would also have been greater. But I guess as with many things in life, greater efforts may not necessarily translate into greater results.
Life. Well, that’s just life, I guess.
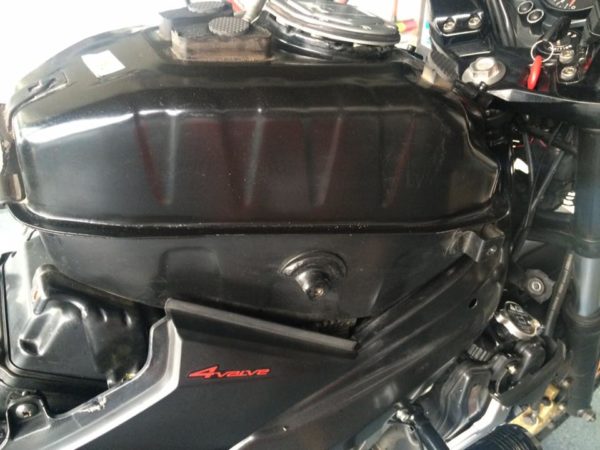
Tank cover off. Before the ugly patch work.
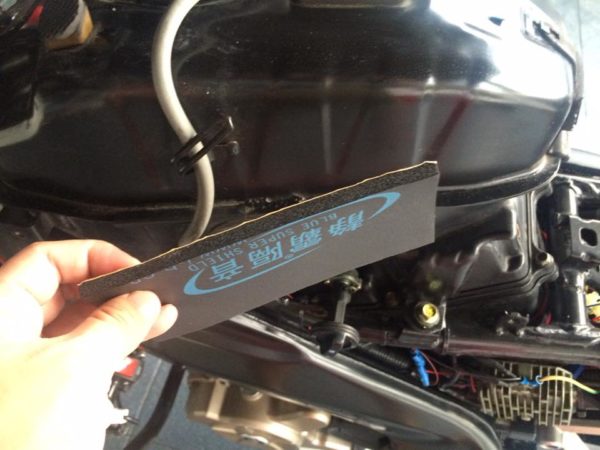
That’s the sound deadener material. It’s got adhesive on one side. It’s like some thick spongy stuff that’s sticky on one side.
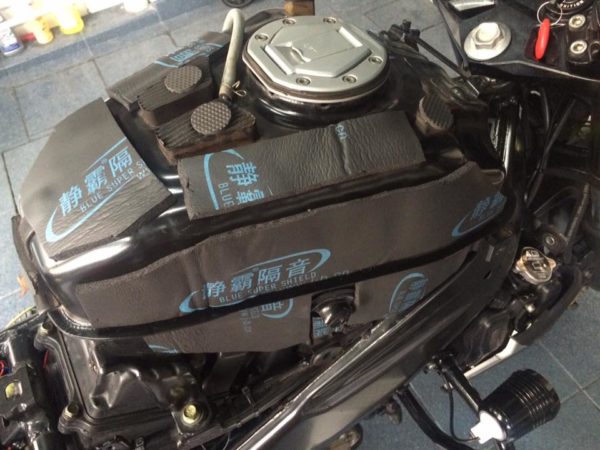
Ugly, right?
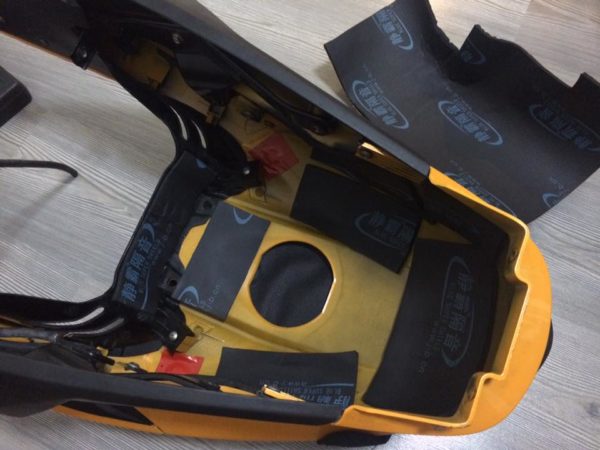
Patch, patch, patch the tank cover too. Notice that red duct tape patches there? That’s used to hold the magnets of my tank bag magnet mod.
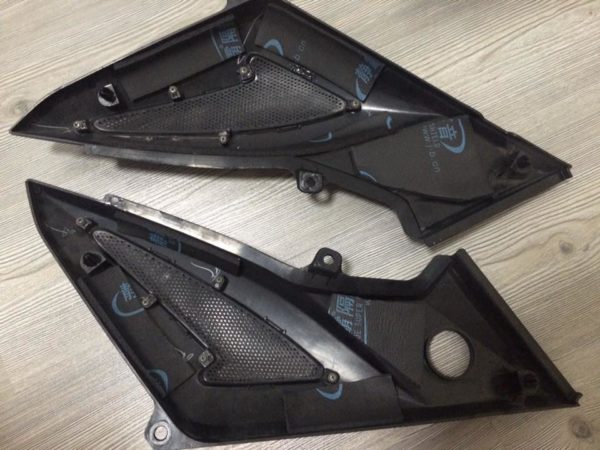
The side panels getting the sound damping treatment. The area just covering the bike’s electrical voltage rectifier did not have the material pasted, so that heat is not trapped around that area.
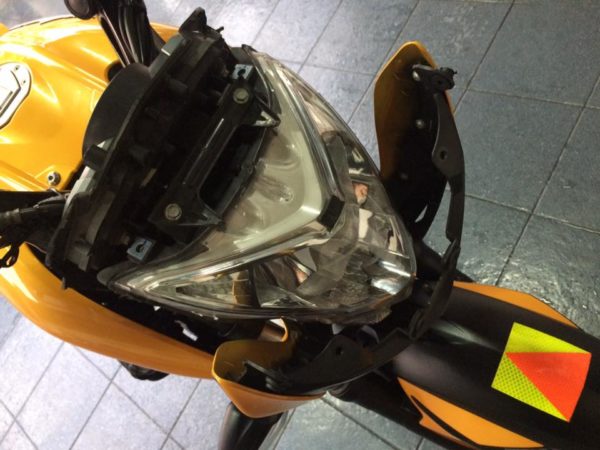
The headlamp fairing gets sound damping treatment too.
God!!! That’s a hell lot of work done to reduce vibrations!!! Never ever has anyone tweaked their NS to such an extent.
I assume by now you have customized your motorcycle completely to be called something else now!!!
Name it… like SGBIKERs 200Boys… 😉
It wasn’t too bad actually… I was really just experimenting with stuff that will make the bike more ride friendly. Nah, I’m not into naming my bike…. although I do call it Pulsar now… hahah.
Your blog is dream come true for me, I’ve been looking desperately online for a biker so dedicated to his NS 200. I’m learning a lot from your content, thank you and happy trails.